|
How to: |
|
Understand the features & limitations of touch screen input. |
|
Features
KineBody Pro offers touch input capability for the most important KineBody operations, including:
- identifying bones,
- selecting joints by tapping on bones,
- moving body or joints, by dragging in the viewing area (or via sliders, for PoseTools users).
It further provides intuitive touch operation for conventional buttons, checkboxes, menus, and similar controls.
Furthermore, touch input allows you to do some operations that aren't possible on non-touch screens. In particular, you can use 'two finger' gestures to control the body position, i.e. to pan or ‘zoom’ the body, and you can do these simultaneously in all 3 directions (x,y,z).
Also, if your touch device supports input from mouse &/or keyboard (e.g., via
bluetooth, for Android), the KineBody features related to those inputs (such
as special modes using modifier keys ([Ctrl], [Alt], [Shift])) should also
work on your touch device.
Limitations
KineBody touch-compatibility has been developed & tested to work with devices, operating
systems, and browsers as follows:
| Device | Operating System | Browsers | Apps |
| Desktop/laptop computer | Windows | Chrome, Opera | --- |
| Mobile/tablet | Android | --- | ✓ |
Please note: This list is not exhaustive: touch-compatible KineBody may work on other
operating systems & browsers, but we haven't been able to evaluate all possibilities.
Also: this list is not guaranteed. There may be some devices that match the list
above, but still can't run KineBody properly, owing to old/slow processors, low
memory, old OS or browser versions, etc.
KineBody's touch input capability is intended primarily for
high-performance tablets, in landscape orientation. It will
work best on large screens (for accessing small bones and controls with 'fat' fingers).
Differences between Touch and Mouse/Keyboard Input
Also note that many KineBody features are associated with mouse or
keyboard input, and so they won't work, or work differently, for touch screens
(unless your device supports such connections). The table below describes some of the important differences between mouse/keyboard vs touch input.
Modifier keys
( [Ctrl], [Alt], [Shift] ) |
Actions involving modifier keys require a keyboard: Modifiers allow you to momentarily change the sensitivity (coarse, medium, fine) of dragging motions, across the viewing area or using sliders. Without a keyboard, you can change the sensitivity using the 'CMF' button in the lower left, but it 'holds' the sensitivity level, until you change it (i.e., not momentary).
Also, 'right click' access to change the Show/Hide Bones mode, is not available. Instead, use a long tap, or the Show/Hide bones button at the middle left side.
|
| Bone identification by 'hovering' |
'Hovering' doesn't work for touch screens. Instead, you have to tap on any bone to identify it. See the next section for further info.
|
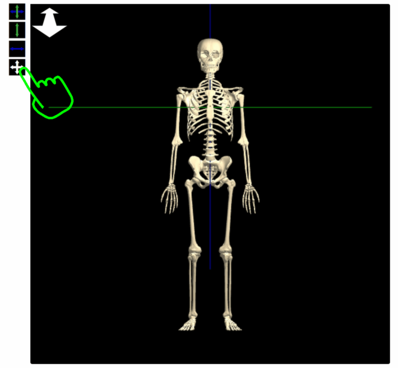
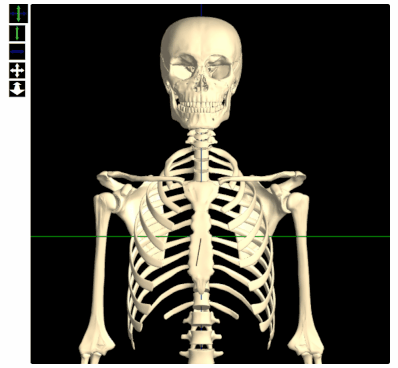
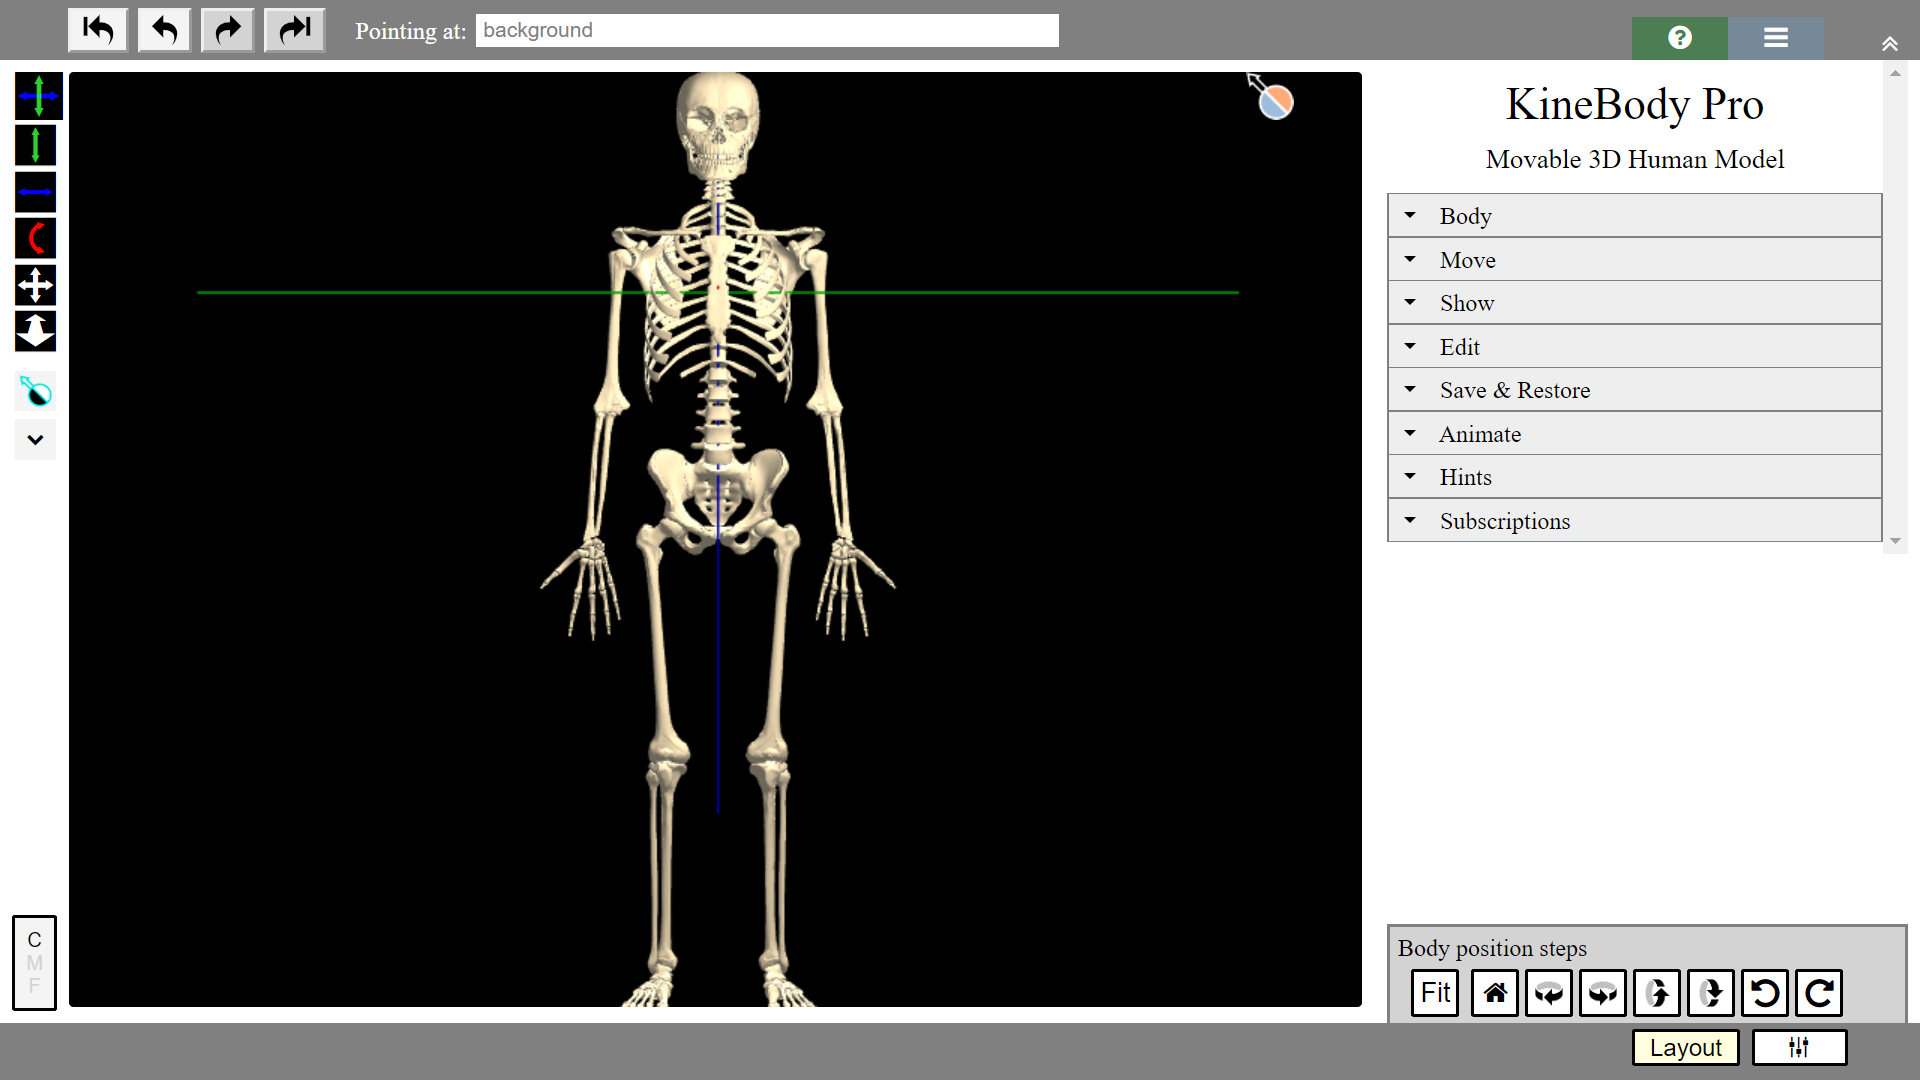
| Colored cursors in the viewing area |
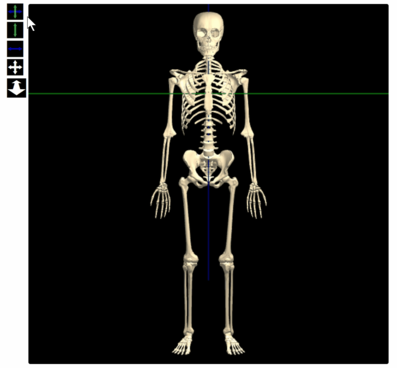
Cursors aren't available for touch screens. Instead, touch screens show an icon in the upper left of the viewing area, to indicate the current movement options.
|
| Select a joint by clicking/tapping its distal bone |
This works for touch screens, but note that it normally requires two taps on a bone: the 1st to identify it, the 2nd to select its proximal joint.
|
|
|
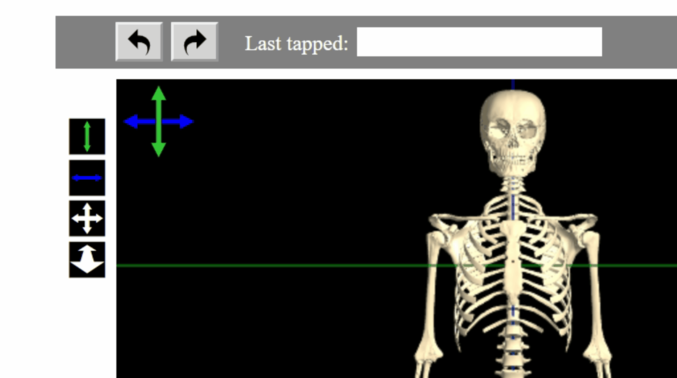
Identify a bone |
|
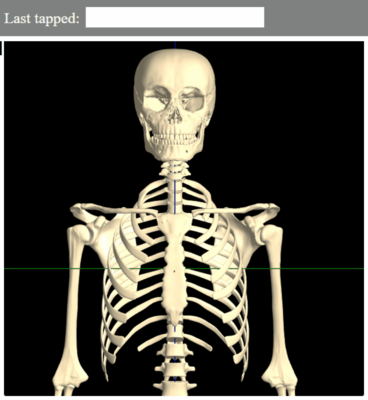 You can determine the name of any bone as follows:
- Tap on the bone once, to show
its name in the ‘Last tapped’ box. The name will remain as is, until you tap on a different bone, or on the black background.
- The bone color will change to orange or purple. (Purple indicates that you've tapped the same bone twice, thereby selecting its associated joint for movement. Further info in the Details section below).
Details
Multi-purpose Tapping
On touch screens, when you tap in the viewing area, several things can happen: you can 'identify' bones (= view their names), you can select or deselect joints (to
set them up for movement),
and (in KineBody
Pro), you can show or hide bones.
You can understand the identifying and selecting behavior most readily via
the effect of tapping on a white (uncolored) bone:
- If you tap once on a
white bone, it serves to identify the bone, and the bone color changes to orange.
- If you tap twice on a white bone, it serves to select the joint associated with that bone, and the bone color changes to purple.
Additional information about bone coloration is provided in the 'Select a Joint' section below.
|
|
Move the entire skeleton |
|
Here are several ways you can move the full skeleton:
A) Drag across the viewing area with 2 fingers

You can translate the body in the horizontal (x), vertical (y), or distance (z)
directions, at any time, using intuitive 2-finger gestures, as follows:
- To ‘pan’ the body (= move in the x &/or y directions), drag in the appropriate direction while keeping a fixed distance between the fingers.
-
To ‘zoom’ (= move in the z direction), use a pinching gesture, i.e.,
move your fingers closer together or farther apart.
- You can change the position in all 3 directions during a single gesture, by combining panning & pinching.
[Two finger movements are only defined for body translations. For body rotations, use the techniques in the next paragraphs].
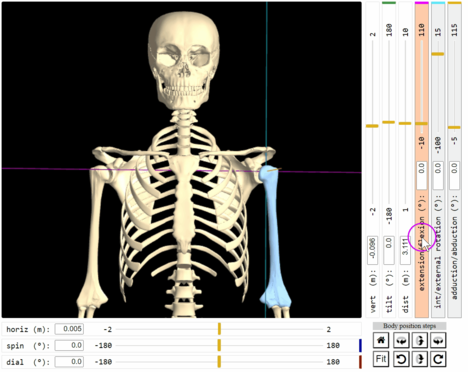
C) Use the white sliders (PoseTools reqd)
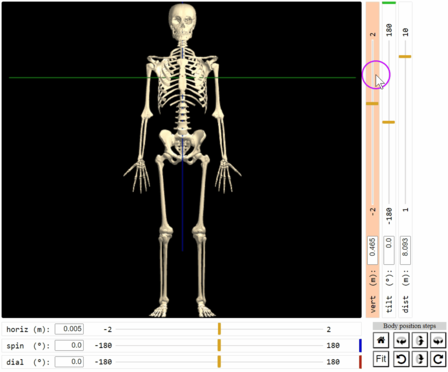
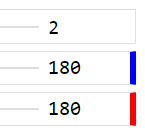
- Select a slider by its label:
| spin | to rotate around the blue axis |
| tilt | to rotate around the green axis |
| dial | to rotate around the red axis (i.e., in the screen plane) |
| horiz, vert, dist | to shift the body without rotating, in the indicated direction |
-- OR --
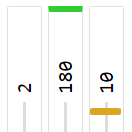
Select a slider by matching the rotation axis color to the color bar at the end of the slider box. For example, choose the 2nd slider to the right, to rotate around the green axis.
- Drag along the slider until you reach the desired position.
|
|
Select a joint (PoseTools reqd) |
|
You have to select a joint before you can move it. You have to deselect all joints, to re-enable full body rotations by dragging.
There are two ways to select (and deselect) joints:
A) Tap in the viewing area
- Select a joint by tapping on the bone (or bone unit) you want to
move. Tap once or twice, until the bone color changes to purple or blue.
- Deselect all joints by tapping on the black background (once or twice,
depending on the color). When all are deselected, there will be no blue or purple bones, only white.
Caution (PoseTools users): If you press & hold your finger
down (instead of immediately retracting it), you may inadvertently invoke the
'Show/Hide Bones' mode, instead of selecting a joint. If this happens,
tap & hold again, to revert to regular joint selection mode - then retry tapping (quicker) to select the joint.
|
About bone colors
: Blue is the base color for the bone(s) adjacent to a selected joint. A bone may alternatively appear purple, if you also tap to identify it. The adjacent diagram summarizes the bone colors used to indicate selected & identified bones:
|
| (natural bone) |
Selected |
| Identified |
Selected &
Identified |
|
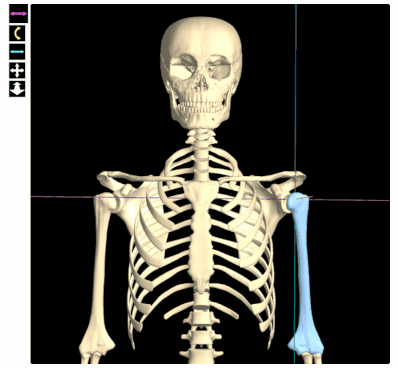
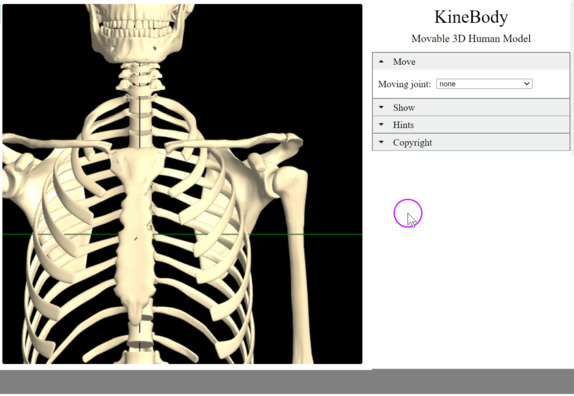
B) Use the 'Moving joint' menu:
- Select the joint by name from the menu. The bone (or bones) near that joint turn blue.
- To deselect all joints, select 'None' from the menu. Any selected bones revert to their natural color (except when using Show/Hide Bones features).
Details
This section presents some relevant background and limitations related to Selecting a Joint.
Of all the anatomical joints that allow movement between bones, not all can be moved in KineBody, for various reaons:
- Low ROM: Joints with low range of motion (ROM) are usually not available. For example, joints within the thorax (i.e., thoracic spine and costo-vertebral
joints) are excluded.
- Combinations & Coupling: Related anatomical joints may be combined, if possible.
For example, the proximal & distal radio-ulnar joints (PRU, DRU) are combined into a single
radio-ulnar joint in KineBody, because they share a common rotation axis. Similarly, at the knee, the patello-femoral
joint is combined with the tibio-femoral joint, as the former doesn't normally operate independently
of the latter.
Sometimes when you click on one bone to select its associated joint, many of its neighbors
also turn blue, and the ‘associated’ joint may be some distance from the bone you clicked.
This happens when the bone belongs to a KineBody bone unit: a set of adjacent bones that have
no movable KineBody joints between them. Some of the characteristics of KineBody bone units
are described in this section.
- Purpose: Bone units are designed to simplify joint selection: you can select
a joint via any bone in the unit, but at the same time, you can still identify the individual
bones.
- Important bone units: The skull (minus mandible) and thorax
(ribs, thoracic vertebrae, & sternum) are formed into units; likewise,
the central pillar (within hand), and 'midfoot'.
-
How to identify: When you hover over a bone and observe its name in the 'Pointing at' box,
its unit name will appear as a prefix, if applicable. For example, 'skull / sphenoid' gives
the unit name & then the bone name.
In KineBody, you can select a joint by clicking on a nearby bone. In many cases, you select
the joint by clicking on the 'bone you want to move'. This feature presumes a special association
between bones and joints, which is described in this section.
For the most part, the bones & joints in KineBody are organized into a well-defined 'family-tree' hierarchy,
with the following characteristics:
- For each joint, there's a single associated bone (or bone unit). Generally, the bone or unit
is 'distal' to the joint. Each such joint+bone (or joint+unit)
combination can be regarded as an indivisibile unit, when discussing KineBody organization.
- Each joint+bone (or joint+unit) combination attaches to a 'parent' bone or unit. Conversely,
any bone can have one or more 'children'. But, no child has more than one parent.
Together, these connections define a tree-like logical structure.
- All connections emanate outward from the thorax as the single common ancestor or 'root' of the tree.
Because of (a), every joint can be selected by clicking on some bone or unit. As a result of (b) & (c),
there's no ambiguity as to which bone goes with which joint: the associated bone,
for any joint, is the one farther from the thorax, i.e., distal to the joint.
As the root of the tree, the thorax plays a special role. For one, it's the only bone or unit without
a parent, and it has no associated joint. Thus, when you click on the thorax, nothing 'happens':
there is no joint to select, no special sliders appear, and the thorax retains its normal bone
color. [To clarify the last part: when a bone is colored blue, it means the associated joint is
currently selected].
Additional information about the bone-joint hierarchy, including the full list of bone & joint names,
is provided here.
|
|
Move a joint (PoseTools reqd) |
|
After you select a joint (above), you can move it by dragging your cursor overt the viewing area, or by using the (gray) sliders:
A) Drag across the viewing area using 1 finger
-
Select a joint rotation axis, by tapping one of the joint rotation mode
buttons
( for example:


 ).
Match the button arrow
color
to the the rotation axis color.
).
Match the button arrow
color
to the the rotation axis color.
-
Drag in a direction as indicated by the arrow on the mode button:

|
drag normal to the axis.
|


|
drag in an arc, around the joint center (= the point where its rotation axes cross).
|
B) Use the gray sliders (PoseTools)
- Select a slider by its label, or, by the matching the rotation axis color to the color bar at the top of the slider box. For example, choose the middle slider to rotate around the blue (cyan) axis.
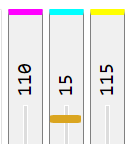
- Drag along the slider, until you reach the desired position.
Troubleshooting
| Problem | Cause / Solution |
|---|
| Movements are slow &/or jerky | Low memory
Old browser |
|
Colored cursor doesn't appear, when select from movement palette
| Colored arrow cursors are not available for touch screens.
|
|
Mac only: Bone(s) jump back to previous position, when using full screen.
|
While viewing full screen, move cursor to very top of screen (so that Mac OS menu bar appears).
Then resume regular operations - the jump problem should be gone.
|
Details
This section provides additional information re: operation of some special control modes and joints in KineBody.

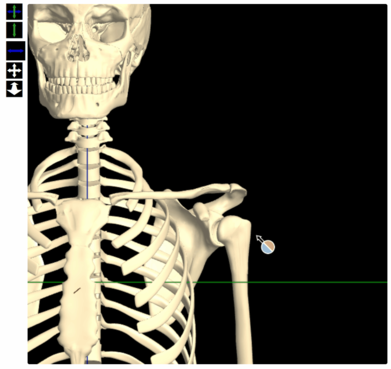
KineBody Pro also offers a biaxial movement mode for many joints, as indicated by the icon & cursor that combines magenta & yellow arrows.
This mode allows you to move the joint in two directions simultaneously, but it can be challenging to use, because rotation around the magenta axis causes the yellow axis to move, and these movements can be accompanied by ’reversals’ in the control behavior. When these situations arise, we recommend forgoing the biaxial control mode, & instead select the magenta OR yellow arrows, to control one axis at a time.
In KineBody, the shoulder has a special property, whereby the scapula is forced to
follow the posterior ribs, whenever you move the sterno-clavicular or acromio-clavicular joint.
This property requires some special changes to the regular KineBody joint behavior.
This is evident if you select the acromio-clavicular joint (by clicking on the scapula): three
joint sliders will appear, but only one ('down/upward rotation') is usable, the other two being
disabled. Yet, if you move the down/upward
rotation slider, you can observe changing values at the other two sliders.
In essence, the two disabled sliders are being used to enforce the constraint that makes the scapula
follow the ribs. To put it another way, if these sliders were enabled, you could
move the scapula unrealistically, away from the ribs, or into the ribs.
A similar situation occurs when you move the sterno-clavicular joint, but it's not readily apparent.
In this case, two degrees of freedom (DOFs) for the acromio-clavicular joint are being used to keep the
scapula close to the ribs, but the sliders for those DOFs aren't shown.
[Note: the current scapula constraint mechanism can be overridden, to allow full 3 DOF movement, via the
Unlimited ROM feature in PoseTools].
KineBody Pro allows you to move multiple spine joints with a single control, in the neck or lumbar
regions. You can select either of these 'joint groups', by name in the Moving joint menu. Or,
to select the neck, click on the skull (group); for the lumbar region, click on the sacrum. Once
selected, you can move the joints using the regular methods, i.e., using the gray joint
sliders, or by dragging across the viewing area.
The axes for these groups are rendered as dashed lines, attached to the thorax (i.e., away from the ‘nearest proximal joint’). Both of these effects are consequences of the ‘group’ nature of these joints. For further details, please see Group Motions: Neck & Lumbar Spine.
You can also select & move indivdual spinal joints, using the regular KineBody methods, with a
couple of exceptions: of the neck joints, you can't move the Occiput-C1 joint individually, and
the same goes for the L5S1 joint in the lumbar region. The reason is that, within the software,
the group joint mechanism 'borrows' some of the regular parts from the individual joints. For instance,
the neck uses the slider that would normally actuate the Occiput-C1 joint. Again, this is a limitation
of the current joint group mechanism.
|
|
View tooltips |
|
Most KineBody controls include tooltips to remind you of their function and options.
 To view a tooltip, on Android devices: Press & hold on the control you're interested in, until the tooltip appears (about 1 second). The tooltip will show as long as you hold your finger down. While it's down, you can slide your finger out of the way, if it obscures your view of the
tooltip.
To view a tooltip, on Android devices: Press & hold on the control you're interested in, until the tooltip appears (about 1 second). The tooltip will show as long as you hold your finger down. While it's down, you can slide your finger out of the way, if it obscures your view of the
tooltip.
[The last technique doesn't work on any of the body or joint movement sliders - for these, the tooltip will disappear immediately when you move your finger, and your finger movement will be interpreted as a slider commmand].
|
For Windows touch devices, the operation differs slightly: Press & hold on the control, for more than 1 second, then lift your finger - the tooltip will appear about 1 second later.
It will then remain visible until you tap some other place on the KineBody window; to clear any visible tooltips, tap somewhere on the white background.
[Note that the tooltip mechanism for Windows devices has an unresolved problem: tooltips will appear even if you don't hold for 1 second, i.e., during normal (quick) taps. This annoyance can be bypassed by disabling tooltips via the 'Show Tooltips' control as described below. Note that if you choose to view the tooltips in this case, the 1 second hold is still useful: it prevents the normal action of the control, so you can view the tooltip without any accompanying side effect. ]
|
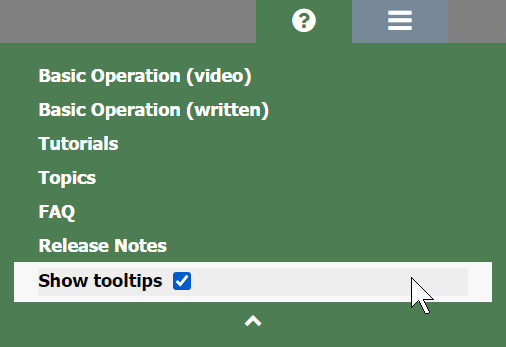 To disable tooltips: You can disable all tooltips using the 'Show tooltips' checkbox, located at the bottom of the KineBody Help menu. Your choice will be retained between KineBody sessions, if using KineBody Pro.
|
|
 You can determine the name of any bone as follows:

 I Agree panel (appears on occasion)
 (while the app is loading)
 App is ready to use.
 rotate around blue &/or green axes
 rotate around green axis
 rotate around blue axis
 distance adjustment